Monday, July 9, 2018

Proxy using bashrc

Put your settings into ~/.bashrc or ~/.bash_profile so you don't have to worry about your settings everytime you open a new terminal window!
If your company is like mine, I have to change my password pretty often. So I added the following into my ~/.bashrc or ~/.bash_profile so that whenever I open a terminal, I know my npm is up to date!
  1. Simply paste the following code at the bottom of your ~/.bashrc file:
    ######################
    # User Variables (Edit These!)
    ######################
    username="myusername"
    password="mypassword"
    proxy="mycompany:8080"
    
    ######################
    # Environement Variables
    # (npm does use these variables, and they are vital to lots of applications)
    ######################
    export HTTPS_PROXY="http://$username:$password@$proxy"
    export HTTP_PROXY="http://$username:$password@$proxy"
    export http_proxy="http://$username:$password@$proxy"
    export https_proxy="http://$username:$password@$proxy"
    export all_proxy="http://$username:$password@$proxy"
    export ftp_proxy="http://$username:$password@$proxy"
    export dns_proxy="http://$username:$password@$proxy"
    export rsync_proxy="http://$username:$password@$proxy"
    export no_proxy="127.0.0.10/8, localhost, 10.0.0.0/8, 172.16.0.0/12, 192.168.0.0/16"
    
    ######################
    # npm Settings
    ######################
    npm config set registry http://registry.npmjs.org/
    npm config set proxy "http://$username:$password@$proxy"
    npm config set https-proxy "http://$username:$password@$proxy"
    npm config set strict-ssl false
    echo "registry=http://registry.npmjs.org/" > ~/.npmrc
    echo "proxy=http://$username:$password@$proxy" >> ~/.npmrc
    echo "strict-ssl=false" >> ~/.npmrc
    echo "http-proxy=http://$username:$password@$proxy" >> ~/.npmrc
    echo "http_proxy=http://$username:$password@$proxy" >> ~/.npmrc
    echo "https_proxy=http://$username:$password@$proxy" >> ~/.npmrc
    echo "https-proxy=http://$username:$password@$proxy" >> ~/.npmrc
    
    ######################
    # WGET SETTINGS
    # (Bonus Settings! Not required for npm to work, but needed for lots of other programs)
    ######################
    echo "https_proxy = http://$username:$password@$proxy/" > ~/.wgetrc
    echo "http_proxy = http://$username:$password@$proxy/" >> ~/.wgetrc
    echo "ftp_proxy = http://$username:$password@$proxy/" >> ~/.wgetrc
    echo "use_proxy = on" >> ~/.wgetrc
    
    ######################
    # CURL SETTINGS
    # (Bonus Settings! Not required for npm to work, but needed for lots of other programs)
    ######################
    echo "proxy=http://$username:$password@$proxy" > ~/.curlrc
  2. Then edit the "username", "password", and "proxy" fields in the code you pasted.
  3. Open a new terminal
  4. Check your settings by running npm config list and cat ~/.npmrc
  5. Try to install your module using
    • npm install __, or
    • npm --without-ssl --insecure install __, or
    • override your proxy settings by using npm --without-ssl --insecure --proxy http://username:password@proxy:8080 install __.
    • If you want the module to be available globally, add option -g
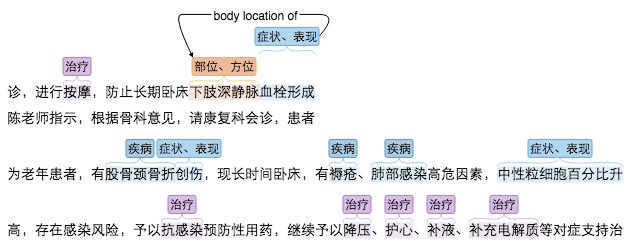
Entity Annotator from git (annotation-tool)

Synyi annotation tool

To Setup:

https://github.com/synyi/annotation-tool.git


Powered by Svg.js + TypeScript + System.js
screenshot

Entity Annotator from git (annotator-marginalia)

annotator-marginalia 


To setup :

https://github.com/emory-lits-labs/annotator-marginalia.git


Annotator.js plugin for creating and displaying annotations in the margin of a page.
Marginalia is developed for Annotator 2.x

License

annotator-marginalia is distributed under the Apache 2.0 License.
##Dependencies
##Using Marginalia To use this plugin in your Annotator project, include the required javascript and css, and initialize it as an annotator module with a optional configuration.
See installation instructions for more details.

Developer Notes

This project uses git-flow branching conventions.
To view the jekyll site for development, you should do the following:
  • make sure you are on the develop branch
  • make sure you have jekyll installed
  • run the site via jekyll: jekyll serve
To install grunt utilities for building releases, run: npm install
Released versions are published through GitHub site pages, which are served out from the gh-pages branch. Following git-flow conventions, this should be an exact replica of the master branch. As a convenience, to update the gh-pages branch from master and push it to github, you may want to configure the following alias in your .git/config for this project:
[alias]
    publish-pages = "!rm -rf build && git checkout gh-pages && git merge master && grunt && git add 'build/*' && git commit 'build/*' -m 'Latest build' && git push origin gh-pages && git checkout -"
Whenever you tag a new release you want to be available as a version that can be included from the github pages url, you should do the following (or use the alias above):
  • update the version number in package.json
  • use gitflow to tag the release
  • checkout gh-pages branch, update from master and run grunt
  • add the build version of annotator.meltdown.min.js and css to gh-pages branch

Saturday, June 23, 2018

Extract Text from from multi-page PDF with only Images


Image result for ocr image


Sometimes there are only images in a PDF. In such cases you can not select text to copy / paste or just for reference.
To extract text from an Image or a PDF containing only images, I used Tesseract OCR Engine and Ghostscript. I am running Fedora 19 at the moment, however these steps should apply to an older version of Fedora or Ubuntu. ( I believe this can be done on Windows as well ). Both Tesseract and Ghostscript are free softwares.
First, install both Tesseract and Ghostscript on Fedora:
$ sudo yum install -y ghostscript tesseract
Now go to the folder where your PDF is located ( assuming that it is named as story.pdf ):
$ cd ~/Downloads/
Next, extract each page from PDF as a PNG. For this I used Ghostscript. Note the resolution ( -r300 ):
$ ghostscript -dNOPAUSE -dBATCH -sDEVICE=pngalpha -r300 -sOutputFile="page%03d".png story.pdf
$ ls page*.png
page001.png
page002.png
...
Once we have a PNG for each page, we can use the OCR software to extract text:
$ for f in page*.png ; do tesseract $f $f.out; done
$ ls page*.out.txt
page001.png.out.txt
page002.png.out.txt
...
So, now we have all the text from images into text files. Tesseract works quite well with OCR output, and obviously it cant read drawing or misprinted characters quite well, still its quite accurate.
I hope it is helpful for you.


    References:

    Thursday, June 21, 2018

    How-to install Bash 4.1 in Linux

    How-to install Bash 4.1 in LinuxThis guide is for almost every Linux distribution.

    Prerequisite is that you have the required build tools installed already.
    If not, do the following step:
    Debian and Ubuntu users way;
    sudo apt-get install build-essential
    The Fedora/Red Hat way:
    sudo yum groupinstall "Development Tools" "Legacy Software Development"
    First step is getting the source package
    Next step is compiling and installing it;
    tar xf bash-4.1.tar.gz
    cd bash-4.1*
    ./configure
    make
    sudo make install

    Install Python on Ubuntu (Anaconda)

    Install Python on Ubuntu (Anaconda)

    Install Anaconda on Ubuntu
    The video above demonstrates one way to install anaconda which is good if you want to follow manually install anaconda (just be sure to open a new terminal or type source .bashrc after you finish the install).
    The way below utilizes bash scripts which is a faster way to install anaconda. This should work on Ubuntu 12.04 (precise), 14.04 (trusty), and 16.04 ( xenial).
    1. Open a new terminal.
    2. Copy and paste the paste commands from either gist (python 2 or 3) below on the terminal
    Python 2 Anaconda Ubuntu
    Python 3 Anaconda Ubuntu
    The files are from the Anaconda installer archive.

    Optional Steps

    The following are just optional things to get started on now that you have anaconda installed.
    1. (optional) A good way to test your anaconda installation is to open and use a Jupyter Notebook. Type the command below in your terminal to open a Jupyter (IPython) Notebook.
    jupyter notebook
    If you want a basic tutorial going over how to open Jupyter and using python, please see the following video.
    Python Basics 1: Hello World + Strings
    A blog version of the video can be found here.
    2. If you want to use both python 2 and 3, please see the following tutorial on Environment Management with Conda.
    3. I often get asked how to started with machine learning, here is a step by step tutorial on getting started with machine learning.
    Please let me know if you have any questions! You can either leave a comment here or leave me a comment on youtube. The youtube video has a ton of questions on it answered already (please subscribe if you can)!